
Introduction
In this guide, we will show you how to fix git merge conflict vs code quickly and easily. Seeing a conflict warning can be scary, but with Visual Studio Code’s built-in tools, you don’t need to panic.
In simple terms, a merge conflict happens when two people (or two branches) attempt to change the exact same line of code in different ways. Git is smart, but it cannot guess which version is the “correct” one—so it pauses and asks you to choose.
In this guide, we will walk through how to fix git merge conflict vs code utilizing the built-in, user-friendly interface that turns a stressful situation into a few simple clicks.
Step 1: Understanding the Conflict UI
When a conflict occurs during a git merge or git pull, VS Code instantly detects it. When you open the file containing the conflict, it will look different than usual. You will see specific colored highlights and strange symbols inserted into your code.
Decoding the Markers
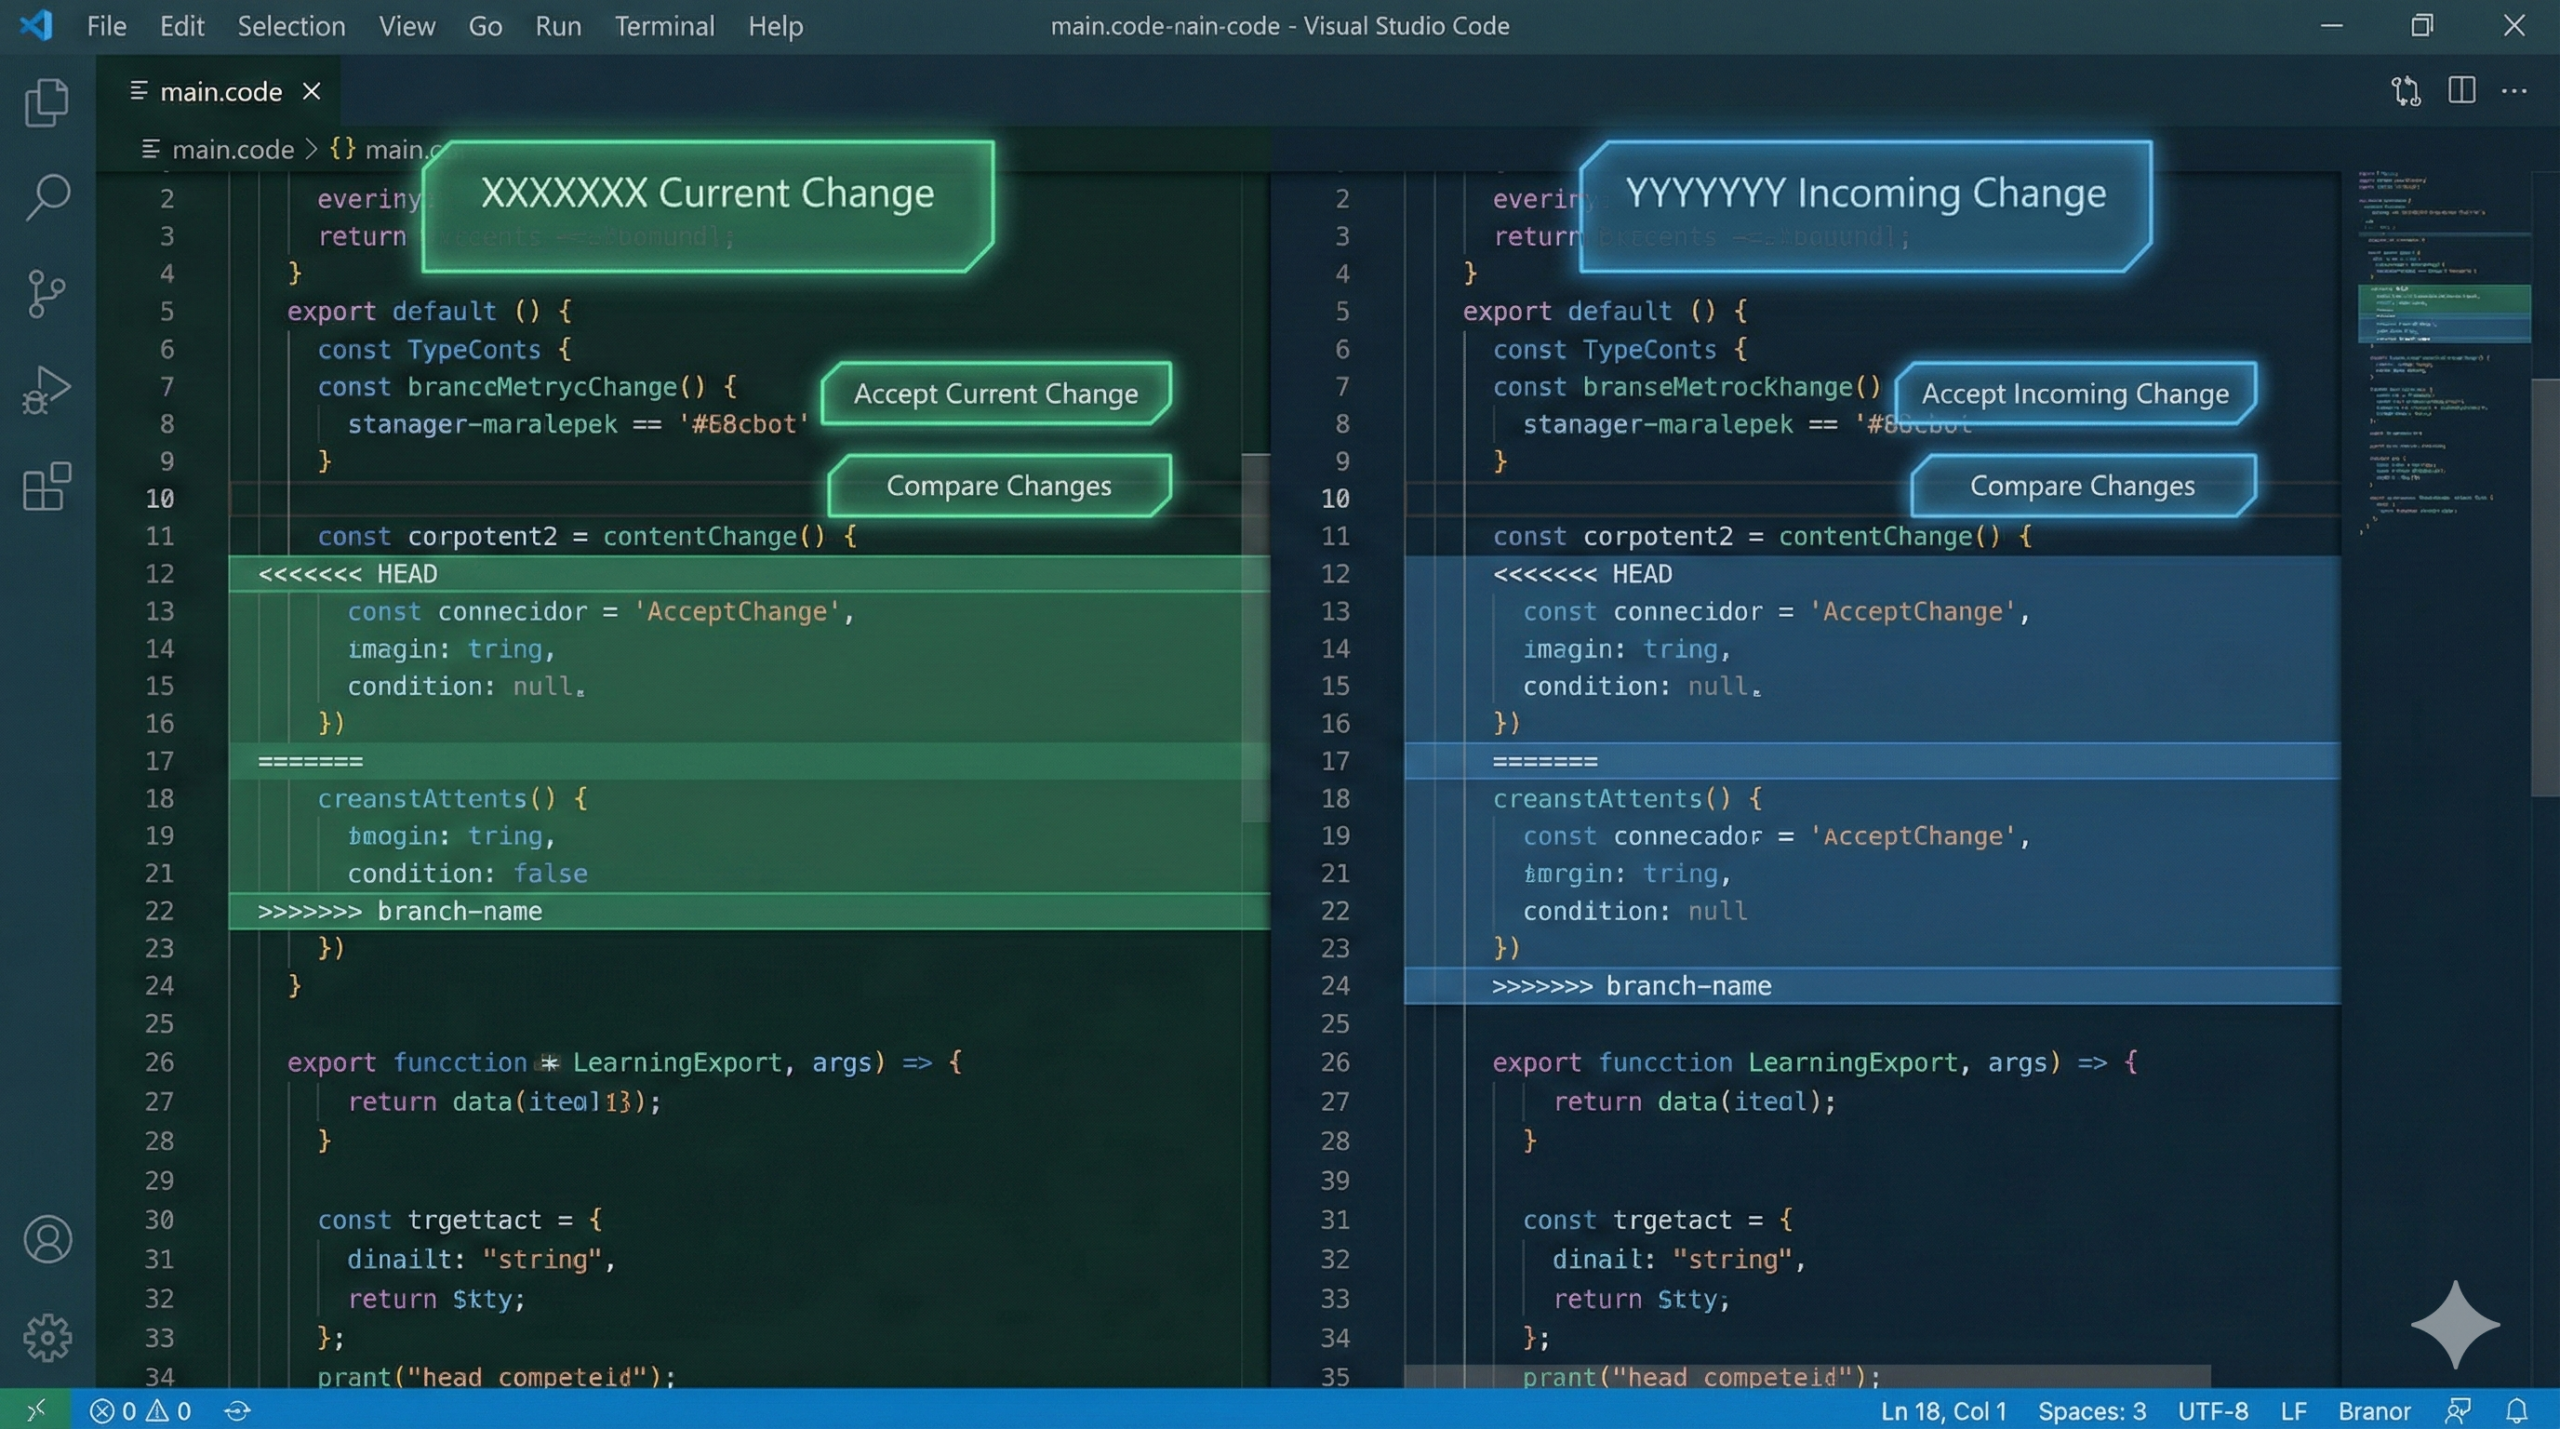
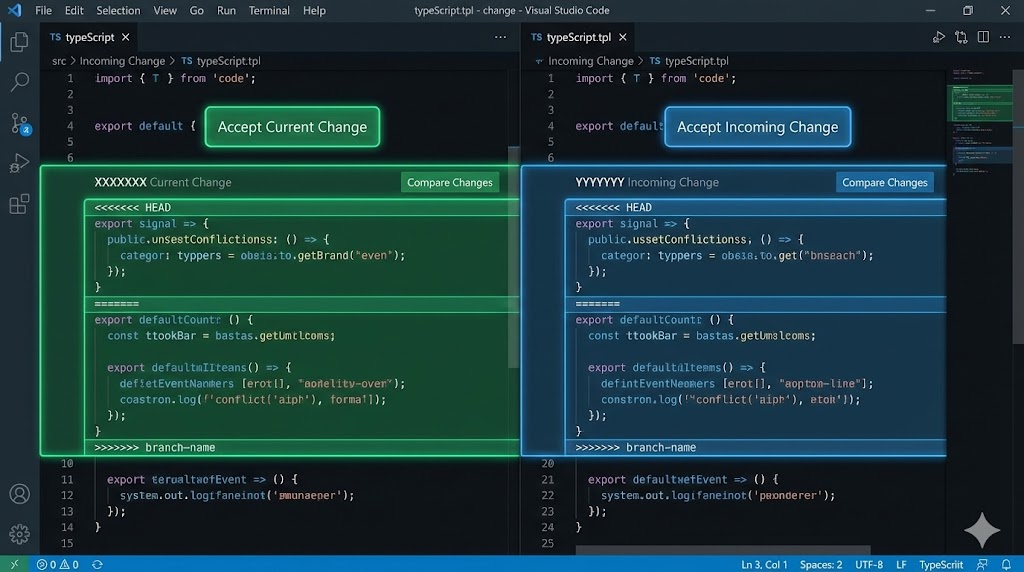
Git injects three specific markers to show you exactly what happened:
<<<<<<< HEAD(Current Change): This represents your code. It is the code that currently exists on the branch you are working on. VS Code typically highlights this section in green or blue (depending on your theme).=======(The Separator): Everything above this line is your code; everything below it is the code coming from outside.>>>>>>> branch-name(Incoming Change): This represents the other code. This is the code coming from the branch you are trying to merge in. VS Code typically highlights this in purple or teal.
Key Takeaway: You are looking at two versions of reality. Your job is simply to tell VS Code which reality is true.
Step 2: Using the “CodeLens” Options (The Solution)
This is where VS Code shines. Right above the <<<<<<< HEAD marker, you will see a set of clickable gray text buttons. These are called CodeLens actions.
Instead of manually deleting the symbols and code, you can click one of these buttons to instantly resolve the conflict.
The 4 Options Explained:
- Accept Current Change:
- What it does: Keeps your code and deletes the incoming code.
- When to use it: When you know your work is the correct version and the other branch is outdated or wrong.
- Accept Incoming Change:
- What it does: Deletes your code and keeps the code from the other branch.
- When to use it: When the other developer’s update is the one you want to keep (perhaps they fixed a bug you were also working on).
- Accept Both Changes:
- What it does: Keeps both blocks of code, removing only the Git markers.
- When to use it: When both changes are necessary (e.g., you added a function at the same time your teammate added a different function). Note: You may need to manually format the code afterward to make sure it runs correctly.
- Compare Changes:
- What it does: Opens a “Diff View” (Split Screen) showing the two versions side-by-side.
- When to use it: When the conflict is complex and you need to read the surrounding code to understand which version is better.
Step 3: Staging and Committing the Fix
Once you click an option (e.g., Accept Incoming Change), the conflict markers (<<<<<<<, =======, >>>>>>>) will disappear. However, you are not done yet!
Git still thinks the file is in a “conflicted” state. To finalize the fix, you must save, stage, and commit.
- Save the file (
Ctrl + SorCmd + S). - Open your Source Control tab (the branch icon on the left) or use the terminal.
- Stage the changes to tell Git you have resolved the conflict:Bash
git add . - Commit the merge:Bash
git commit -m "Resolved merge conflict in style.css"
Once the commit is successful, your branch is clean, and the merge is complete.
Step 4: Using the “Merge Editor” (For Complex Conflicts)
If the conflict is very large or confusing, the standard view might not be enough. VS Code recently introduced a powerful 3-Way Merge Editor.
When you have a conflict, look for a button in the bottom right corner of the window that says Resolve in Merge Editor.
How the Merge Editor Works:
- Top Left (Incoming): The code coming from the other branch.
- Top Right (Current): Your code.
- Bottom (Result): The final file.
You can check boxes in the top windows to selectively move specific lines into the Result window at the bottom. This allows you to mix and match lines from both branches with surgical precision.
Conclusion
Conflicts are not a sign that you did something wrong; they are a sign that your team is working hard! They are a natural part of collaborating on software.
By using VS Code’s visual interface, you avoid the risk of accidentally deleting code or leaving behind stray conflict markers. Next time you see a conflict, take a deep breath, read the colors, and click the button that matches your intent.
Now that you’ve sorted out your Git issues, ensure your Python environment is error-free. Check our guide on how to fix pip is not recognized error.
Yorumlar kapalı.